Pages

03 October 2013

Farnley Burton Waiting Room


It's been a while since I last posted, but I actually finished this model back in the summer - remember that? I was still in the middle of finishing off the canopy on the main station building when I saw a plan one of the members on RMWeb had posted with the intention of building it for his Lincolnshire based layout. Whilst probably not strictly architecturally correct for the LMS  and my own layout, I rather liked the look of it, and its pitched roof matched the roof or the main building, so I decided to build it in the same style as my other structure, with stone walls and slate roof.


Naturally I started with a drawing of all elevations and printed them out onto self adhesive, then stuck them on to my trusty foamex sheets, using 2mm to give a 6 inch window reveal depth.


basic structure complete, with a few Citadel Orcs muscling in on the action..
Architectural moulding details were added with strips of 1mm foamex and the roof was constructed of more of the same, sanded down flush with the edge of the walls.


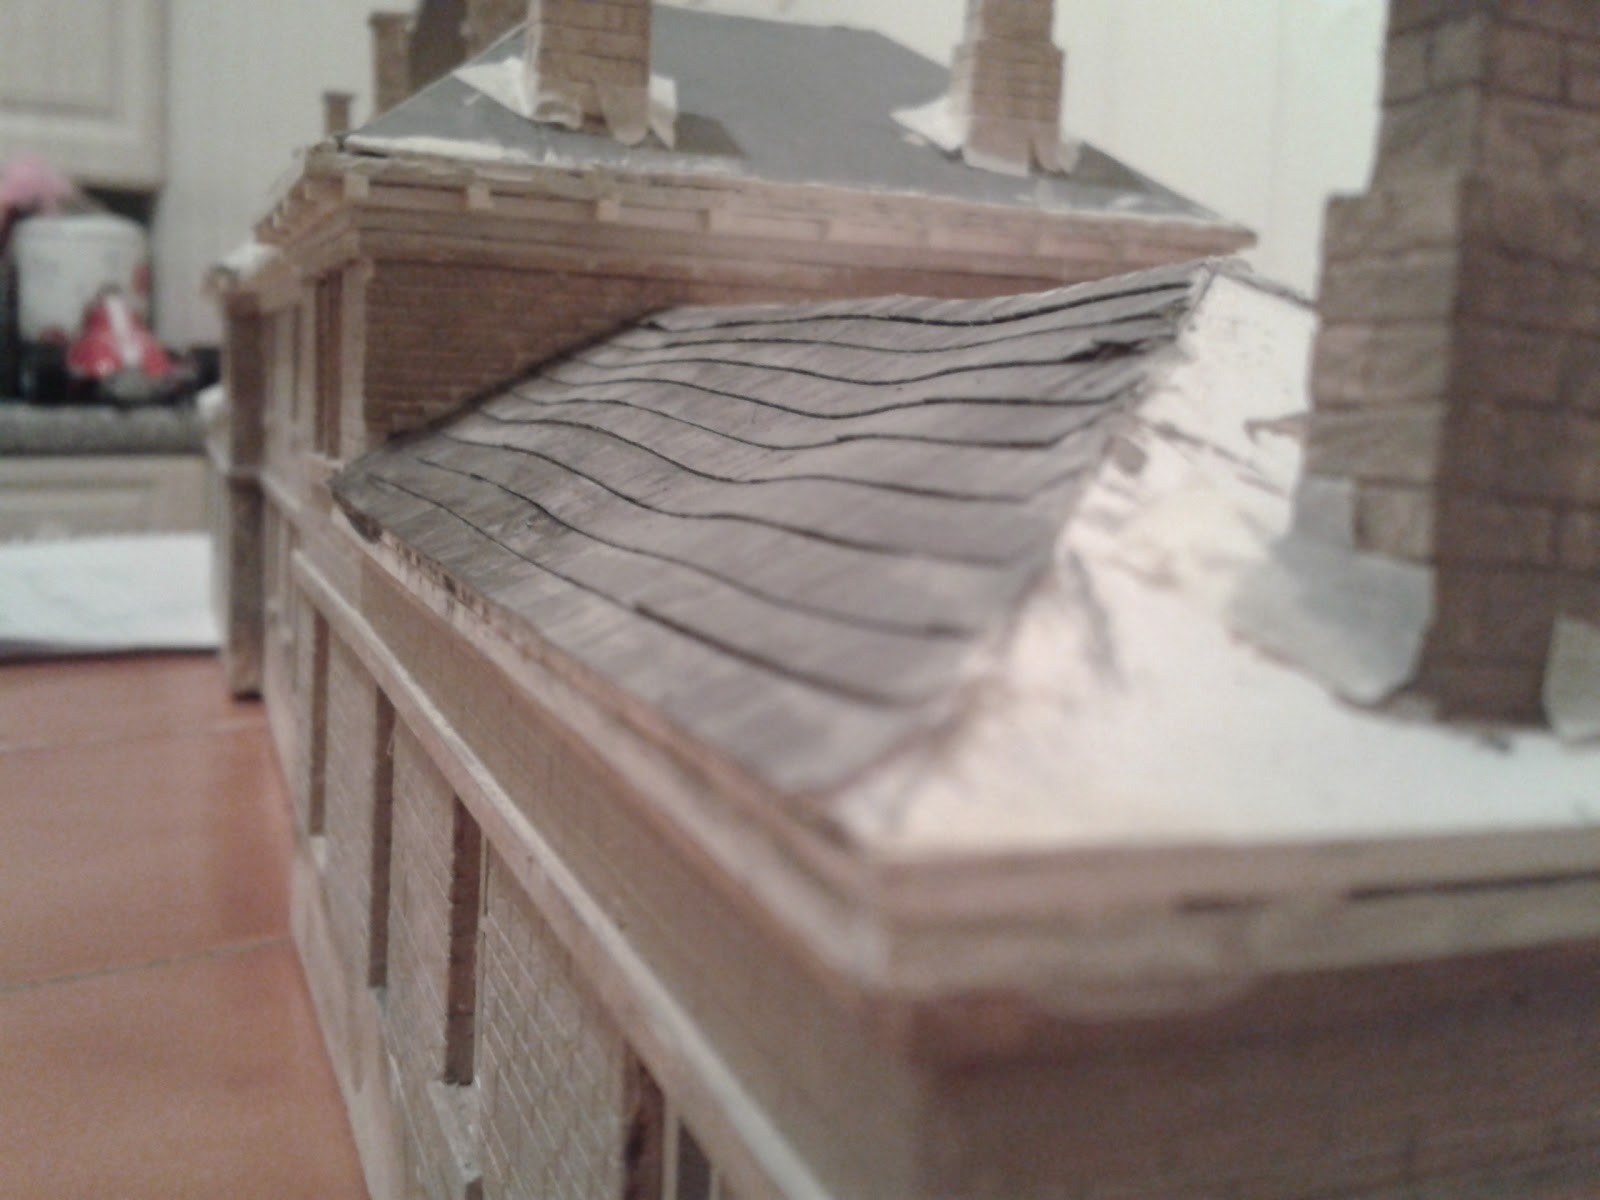
The next stage was to add strips of paper for the roof slates with notches cut to represent tiles. At this stage I also added on strips of Evergreen half round for guttering. 


The roof was made completely removable and was designed to slot on snugly to the walls, the idea begind this being two-fold - 1, so I could add lighting at a future date, and 2, so I could paint up the walls first before adding the windows, thus avoiding getting paint on the window frames.


After everything had received a grey undercoat, I painted the walls the base stone layer, then got carried away and painted up the roof and chimney stack, which again is made from the same combination of 2mm and 1mm foamex. The pots were made from little sections of cotton bud sticks with a small piece sliced in half to represent a half-clay. These were then embedded into a pad of Das clay. I didn't have any terracotta paint so I mixed up my own from various acrylic colours I had lying around and I think it came out well. The roof was painted up by washing over with very dark grey black, then when dry, dry-brushing over with a grey blue mix, adding a little magnolia for a finishing highlight.


Following the roof, I set upon heavily weathering the stonework using the same technique that I painted the main station walls in a previous post. It really is satisfying seeing the stone come alive.


Next it was time to add the windows, made from pieces of acylic with painted cut vinyl frames, then adding some guttering using Iain Robinson's method of twisting thin pieces of wire around slightly thicker wire, in this case it was actually some plasticised wire I found in my scrap box.


And then finally, a couple of doors were added and some signage applied to give it that finishing touch. Compared to the station building, I really raced through this project and I think it makes a perfect building to what will eventually be platform 2 on the layout...


30 July 2013

Can of Peas

Canopies...

Well the original building I based the station building  on, West Worthing,  in the fifties had a double canopy at the front, and as of present day, it only retains the single canopy over the main entrance at the top of the steps -  the gabled canopy over the steps having long gone:
Image courtesy of google maps
So I decided to model it as it is now, being as the model is based loosely at the end of steam and the beginning of Diesel, those terrible denizens of railway bureacracy having decided to strip out the more ornate aspects of Victorian ironmongery.

Having looked at the prototype, it looks like there's only a single canopy bracket in the centre of the wall, so I began by scratch building the framework from Evergreen Microstrip having made a printed template and laying each part over said template, trimming to fit.

In this not great photo, you can see the canopy bracket and the  supporting framework made from 1mm square styrene strip. I sprayed these with primer before gluing to the structure.

The framework was next, and at this stage the canopy was starting to take shape. Further sections of 1mm square styrene were added at intervals for the supporting structure, glued at either end of slotted into place

I then painted the framework cream in preparation to add glazing


Glazing was then added in a single piece, and sections of 10thou x1mm strips were glued on to represent glazing bars.


At this point I realised that I was going to run out of microstrip for the glazing bars, so in tis photo, although you can't really see it, there are two bars missing.

Next stage is to make a valance and weather it all - its all looking a bit too clean -so watch this space....


In addition to canopy work, I've also added a few downpipes to the front. Additional downpipes are waiting until I finish the canopy...


12 July 2013

Forgive me Blogger, for I have Sinned...

...It has been 7 weeks since my last Blog-session...

...but then again, I have been rather busy on other non-model related activities..

Right, Where were we?

Yes, the infamous never ending station building...

After a couple of false starts regarding the colouring and the roof warping, I've finally got something I'm happy with and I could start with fitting the windows back in. The technique was still the same with regards to the frame, but this time I decided to paint the windows rather than just leave them plain white (having since found out that white pigment was hard to come by in the late 50s/60s)

Once I'd constructed the 3 ply frames out of self adhesive cut vinyl, I then treated them to an undercoat of the Pound Shop's finest grey primer (the vinyl it impossible to paint on untreated) Once dry they had a couple of coats of Humbrol cream acrylic for the inner frame, then with a 000 brush painted the outer frames with crimson. They need a bit of touching up here and there, and a wash of grime to take away the "just painted" look, but I'll do that later under the final touches stage.

The windows were then fixed to a piece of 1.5mm acrylic (beautifully clear and scratch-free). A bit on the chunky side, but as the interior is not modelled or seen, it isn't really an issue.
These were then superglued in from the reverse, not without the usual issues of getting glue where it shouldn't or even your intrepid protagonist managing to stick his fingers fast to the roof... luckily I managed to extracate myself with only the minimal damage of losing one roof tile. I also managed to do the same thing with the trackside wall and pulled some paint off when unsticking myself... darn it!

so, it's almost done...


Just the chimney pots, the downpipes and the canopies to sort, and then I can start on the platforms....


24 June 2013

The Joy of Painting and a few late nights...

The weekend saw a few late nights (such devotion to the hobby, or did I just get carried away)

I'm still not sure if the stone is too dark, but then again, it's supposed to represent a pre-Clean Air Act environment, and I've seen some buildings here in Leeds that are STILL black...

The stonework was treated to several layers of built up colour - having an overall sand colour applied as a base, then washed over with dilute brown. When dry (speeded up with a hair dryer) it was treated to an additional wash of dilute black.

Once this was dry, I painstakingly went over all the mortar course lines with a dilute magnolia mix, which settled into all the mortar lines. Some were a little clogged from the multiple coats of paint these walls have received, but I think that is perfectly acceptable as it breaks up the uniformity. Once this had all dried it left a tide mark around some of the edges (more noticeably on the track side where it had got really late and I got a bit more urgent in painting, opting to just splash it on rather than follow the mortar courses) which was then hidden with a dry brush of brown black to weather it all up.


I'm very pleased with how the roof has gone:


Close up photography can be very cruel - it shows up the patchy and sometimes wonky edges on the bargeboards and guttering - I'll have to go over them again. The roof tiles will alsoo receive a bit more weathering - especially around the chimney stacks. I also noticed when photographing this morning that I missed painting a bit of leading around one of them


The mortar shown here is probably a bit too light as it faces trackside and I think it's going to be treated to additional weathering to make it REALLY sooty.

21 June 2013

Up on the Roof


I'd like to post something a bit more complete in terms of a finished model, but it's been such slow progress as of late, what with painting disasters and such like, so I thought I'd show you a Champagne moment - I've finished tiling the roof!
All the ridge tiles are on, as per my previous explanation, involving cutting 4mm strips of 10 thou, scoring and folding in half, then gluing microstrip on at intervals. Flashing was added to the base of all the chimney stacks, before a Midnight session of Primer spraying in the garage just before bed last night.. "Cough Cough, oops - should have worn a mask..."

Now I'm torn between starting the painting proper in earnest, or adding the chimney pots first, to get everything painted at the same time. I think I'm tending towards adding the pots last, as there's less chance of them getting knocked off, and it should be easy enough to patch in the painting. I absolutely cannot wait to get painting again now - the left bay roof went really well, so I'll be employing the same colouring there and then going for the stonework!

having had to take out the windows, meant also removing the floors from the second level, but what it has given me is opportunity to srpay the interior grey.

17 June 2013

My worst critic...

...is me!

Despite the positive comments I received about the initial weathering on the station building both here and over on RMWeb, I decided that it just wasn't right for what I wanted. Maybe it was seeing both the real thing and other modeller's treatment of the same sort of soot-stained stonework, but it just didn't do it for me, so I painted over it all again with a light sandstone colour, then over a period of a couple of days washed over a lighter mix to represent the mortar and once dry, dry brushed over the soot colour. This wasn't right either.

So, having seen an alternative method over on RMWeb, I painted it sandstone all over (at this stage, I'd got paint all over the windows, so they had to come out). then washed over with a watery  mix of black and red with a drop of washing up liquid.. Hmm - this didn't look quite as required...so once again, I worked up several washes of the mortar mix and then set to heavily weathering the stonework.. This time it seemed to go quite well, and I was pretty pleased with it....until of course, I then decided it had gone too far and looked too black

you can just see on the right the very dark weathering. At this stage, with the windows removed, it looked more like a bombed and burnt out wreck
Having spent hours and hours getting nowhere, I then mixed up a new base colour with a view to trying yet again. At this stage, I still hadn't finished the guttering and tiling the roof, so I decided to abandon painting until I'd finished modelling the main parts.

more failed stonework painting

So this weekend, has seen a renewed effort in guttering and roof tiling. I've now almost finished tiling the main building (having already finished and painted the right bay), with just the left bay to finish up.

Since removing the windows, I've developed a slightly better technique for making the windows, giving a little more relief. This time the frames are to be painted cream, so I 'll be making each window up from 6 layers of self adhesive vinyl, then spraying with undercoat and painting them cream, before attaching them to the acetate... It's quite time consuming, but they'll be the very last thing installed this time (after the 89th version of the Stone is complete ;) )

The roof, almost finished (well apart from ridge tiles, and flashing adjustments)  Also showing another initial stone base layer on the front elevation
One final bit I managed over the weekend too - you see on the left hand side of the steps, that little white stone cap? Four weeks ago, I knocked the model whilst getting it off the shelf, that stone cap flew off and disappeared..I've only just got round to cutting and gluing on a new one :)

I'm actually driving myself slowly mad with this project, and goodness knows how I'm going to attack the canopies!!! :) But, and this is the important bit, I'm still enjoying it immensely.


17 May 2013

Station Update 3

Just a quickie, so you know I haven't lost sight of the Station... Tiling has progressed on the roof and is complete on the right bay, with just the chimney to repaint, after i'd got it covered in primer...

I was struggling a little to get the tiling to overlap the roof enough for the guttering to sit right, as I'd intended to fit the guttering after but then I figured that it was a lot easier to fit the guttering first, then position the first row of tiles on top of this. Painting the completed portion of roof was a lot of fun and comprised an undercoat of cheap Poundshop grey primer, washed over with dilute black acrylic, then dry brushed with a mix of grey and magnolia emulsion with some blue artists' acrylic mixed in to give it that Slatey tinge..

I've also started to weather up the stonework, but now wonder if I've gone too black...?


11 May 2013

The finished 'Box


Well, it's finally finished - apart from, of course, detailing the interior (I've left the roof removable to allow this) and to add a figure, perhaps, at a later date.

I was working on adding some scenic material to the base and thought, like the brilliant Cowes box by Iain Robinson upon which this model is based, it required just a couple of extra touches to bring it to life. I'd already built the lamp hut as you know, and thought it could do with a couple of oil barrels next to it. I originally hoped to make my own, but experimentations failed in this respect and I thought I was going to have to order some from Langley, but then last night whilst sticking yet another row of slates on to the Station roof, I had a Eureka moment.... About 25+ years ago I was really into collecting Airfix  1:72 scale model soldiers and associated military vehicles. I had grand plans of creating World War 2 Africa conflict dioramas and had Eighth Army and Afrika Korps armies, Tanks, Guns etc. Amongst all this stuff, which I've still got in the loft, I had a recollection that I had an Italieri Diaroma kit, still half on sprue, that I felt sure had some barrels. A quick delve into the loft garnered fruit! I was right! I unearthed 8 barrels, unfortunately poly cemented together by my 11 year old self, but I hadn't done that bad a job on them, so a quick sand down, a spray of undercoat (Matt grey from the Pound Shop) and a dry brush with light grey, followed by a thin wash of black and a final dry brush with Humbrol Rail colour rust, and Robert was indeed your Mother's Uncle.. Planted in place with a dab of UHU and a sprinkling of scenic scatter and course turf around the base of the buildings and I was done!


I had the dilemma, having made the downspouts from undersize diameter wire, having seen a thread over on RMWeb discussing downspouts, of whether to pull then off and start again. But in the end, I don't think they look too bad, so I decided to keep them... Maybe the builders had run out of the correct gauge pipe?...
Oh, one last thing - I added a nameplate, printed of on photographic paper and weathered down with a thin wash of dilute black, then blotted back with a sheet of Kitchen towel.

All in all I'm very happy with this. It started as an experiment with Wills sheets and ended up as my most complete model to date. Now, where to put it...

...And the station? Well, I'm 50% of the way through tiling the roof, but I've run out of Evergreen Half-round until payday, but I've some fiddly roof bracketry (don't know the right term) to add under the eaves to keep me occupied. Maybe I'll photograph some progress shots in the next couple of days...


03 May 2013

The Joy of Sheds

Well, not sheds, huts. Lamp Huts to be precise.
And yeah, I nicked the title off Iain Robinson... I'm sure he won't mind, but yes I can totally see the joy in sheds and little huts.

I decided what my (unfinished) Signal box really needed was a lamp hut, and having researched a little came up with the dimensions for the hut - 6ft wide by 9ft deep. Now, all I needed were the materials to build it...

The core is the trusty 2mm foamex with sides and ends cut and superglued together. To provide a bow roof, I superglued a piece of 10 thou to formers glued between the walls for strength. For the corrugated  iron, I could have used styrene sheets -fine for the walls -but what about the roof? Again I am indebted to the wonderful Iain Robinson who suggested fashioning corrugated sheet out of Kitchen foil embossed over strips of wire. A quick search on youtube resulted in a great video of a guy making 1:50 scale corrugations using cocktail sticks...wrong scale, but right technique.

Off I went down to the local Pound Emporium to find their foil was very flimsy, but what they did have were some foil serving trays - absolutely ideal - thin enough for scale thickness but rigid enough to accept embossing. A trip next door to Asda resulted in a coil of garden wire for the embossing. This stuff is stiff wire with a plastic coating -as it comes, it's ideal for scale soil pipes - the 6inch stuff, but for corrugated iron embossing would need to be stripped - and then it's ideal for downpipes! This stuff is a bargain at just a pound.

Getting it home and making a start on the jig, I encountered difficulties in getting the wire straight enough for purpose. I just couldn't seem to get enough of them dead straight, so I abandoned that idea and looked again to my trusty pvc foam board for help. I printed off a set of lines I'd drawn in Illustrator 1.5mm apart and stuck them to the piece of pvc foam. I then used a ball point pen (rounded tip you see) and a ruler to heavily draw lines into the foamex and leave an imprint. After I'd got my imprint, I taped a piece of trimmed tin foil to the jig, small enough so I could see the lines top and bottom and followed the lines on the foil with my pen. The result is a believable piece of corrugated tin.

Here's the little fella with a blast of Poundshop grey primer. Hinges and catch made from 10 thou plasticard

Another view of the Primed hut next to the Signal box steps. (Signal box steps still need final painting and gluing to the box. I've thrown away the door again. Mark V will be glued in the open position...

A bit of dry brushing over the primer grey with a light grey gave a good base decoration

Rust was liberally, but subtly (this is not a completely rusted to hell hut as yet) applied using Humbrol Rail Acrylic Rust colour with a dry brush

I really like this view. I've now got added incentive to finish the steps and get the whole mini diaroma sceniced up

And the hut in it's solitary glory

I'm really really pleased with how this turned out, and there's nothing else to do on it now, but bed it into a base. One of the most pleasing things for me was the top vent. I cut a piece of plastic tubular lolly stick I'd been saving for modelling purposes, and cut 3mm off the end. I then superglued this to a piece of 2mm foamex. Once stuck solid, I trimmed the foamex roughly around until I was left with about 1mm of material all the way round, then I took a sanding block and hand sanded around the edge until it was mostly circular. Then, here came the fun part. I put the lolly stick end in the chuck of a battery drill and tightened it up leaving the rough side up, switching to top speed I fired it up and then introduced the sanding block to the foamex, sanding it circular. Then I could angle the block to shape the conical top - voila. Then it was simply a matter of supergluing to the roof and priming.

29 April 2013

Scratch-building steps

A quick update to show the signal box steps I scratch built last night. Evergreen square section (0.40x0.40") for the posts and rails, and strips of 0.20x0.80" for the steps and sides. The landing sections were cut from 0.40" sheet. It doesn't quite sit square, but for a first attempt at building steps, I'm more than happy with it. A little light sanding will now follow, then a dusting of grey primer before painting.
You'll also notice a bit of dry brushing has occured on the roof to pick out the tiles, and also the cocktail stick and masking tape stove pipe has had masking tape flashing applied (still to paint)

just through the door, you can see the foamex stove that's fallen over...

The door is still a work in progress. Still not happy with this version, although may just fettle this one to fit now


26 April 2013

What's this? A new update from Lee?

Well it's been a bit of a no progress slog of late as I've documented roofing disasters with both station and now the signal box. I realised that my slates on the 'box didn't overlap the edges enough for them to make the guttering look realistic, so off came the roof and a better one was constructed.

The station? I've got that back to the point it was before I ripped the whole roof off in anger (well not the whole roof, just the sagging one) and have strengthened it all with plasticard. I'm just going to have to work out how the guttering works out around the building before I commit to starting to tile... so an update on the station will be forthcoming once I've got the roof slates on.

As for the Signal box - I completely rebuilt the roof, making it a complete removeable unit and giving it a dusting with a tin of aerosol primer (after handmaking the guttering from Evergreen Half round and gluing on 1mm strips of 10thou plasticard for brackets - a most satisfying exercise.

The completely rebuilt roof complete with tiles from 150gsm paper and  guttering from evergreen half round. Note shoddy red paintwork overlapping onto cream and lack of front windows and doors. I tore these out due to them not being quite right

 The stone base is painted and finished now, and I'm almost done with the cream and crimson, but not too happy with the oversplash onto the white window frames. In Hindsight I shouldn't have been so hasty to fit the windows and painted the frames first.
 A bit of weathering added to the cream paintwork and two battens affixed for the telephone insulator pots. Roof painted grey, but the paint has filled in some of the vertical tile edges, so I may go back over with a sharp scalpel, just to define the tiles a bit more. Windows are now back in the front, but no door, and you may have spotted it - still no steps...

I must admit to guessing where the stovepipe went, going for centre rear, and drilled a 3mm hole squarely through the roof, before installing a cocktail stick to serve as the pipe. I wasn't going to detail the interior, but closer photography shows the inside too much so I have for now given it a basic interior cladding, with further detailing to come

Inside the box. Not looking too bad, but that window there is annoying me again. I'd better not peer too closely at it from this angle, or I'm likely to go insane.
 So, so far, pretty happy with it - still loads to do, not least build the steps, but I think it's going to look right at home on my layout eventually.

Signal Boxes are fun...

*edit*
AND NOW - OVER 3000 VIEWS! ( yes I know a lot of them are spambots, but still I thank all you humans for reading :) )


18 April 2013

Disaster Strikes

I've spent some considerable time cutting strips of tiles from thick paper and nicking in all the vertical tiles, then sticking them to the cereal box roof base. I started gluing with slightly diluted pva, then the roof started to warp, so I switched to neat pva.. it was still warping, so decided it would just have to be a slightly in need of repair roof. I proceeded to stick the tiles on the other side down with double sided tape - Result - a non-warping roof. Great!
I then decided to try a test paint on the flat roof tiles.... The result is as you can see below:
The previously flat roof, now severely warped.

The first side, slightly warped from gluing, but as yet unpainted. Gratuitous Bailey shot

The upshot of this test is I've invested so much time in this model so far and I'm rather exasperated. If this was a rustic barn or row of cottages, I'd be tempted to leave it, but this is a quality building and frankly should have a solid, straight roof, so it's all going to have to come off, chimneys and all to be replaced with a stronger substructure. At least if I take it off carefully, I'll have a cutting template... Watch this space...


On the plus side, I have been having a lot of fun with the Signal Box and the roof of this baby is a lot stronger. I've used 2mm foamex superglued at right angles. This gives a nice deep bargeboard effect at either gable.  The tiles were made in the same way as above, but glued on with neat PVA with no warping disasters...
photo in daylight taken indoors due to high winds outdoors.

That middle window post is a bit wobbly. I'll have to sort that out. Foamex roof stucture has been sanded to right angles (or there abouts) to give a perpendicular edge to affix guttering to.

All in all I'm rather pleased with it so far, and what started out as an starter exercise in using Wills sheet has slowly transformed into a potentially usable model. It's not in the LMS style, but who cares? ;)

16 April 2013

A Diversion Signal

Whilst I'm still well on with the construction of the Station building, I thought I'd have a little modelling diversion to make use of some Wills stone sheets I got a while ago and have a go at a signal box... It's based the brilliant model of Cowes by the ever excellent Iain Robinson but with the Farnley Burton twist of having a stone base. I could have built that quite easily from pvc foam but I wanted to try conventional methods and must admit the results are very pleasing, especially taking time to mitre the corners with some fine grit sandpaper stuck to a block. The frame is foamex (of course) and the windows are the old cut vinyl method  alhough I had to go to just one layer due to the small size and fiddlyness aspect. I made the overlapping boards from strips of thin card, overlapped and stuck together, then recessed in holes in the wall sides. The roof is only temporary at the moment as it's in position just to see how everything is looking. After much soul searching I think I'm going to be painting this (and the station building) in LMS colours, with white on black name and running boards...


09 April 2013

Station Update 2.1

 Just a quick update to show more windows and doors fitted and the roof base layers fitted for both bays.
Just 3 doors to fit on this side


and 6 windows to fit on this side - note the opened main door :)