Well, not sheds, huts. Lamp Huts to be precise.
And yeah, I nicked the title off Iain Robinson... I'm sure he won't mind, but yes I can totally see the joy in sheds and little huts.
I decided what my (unfinished) Signal box really needed was a lamp hut, and having researched a little came up with the dimensions for the hut - 6ft wide by 9ft deep. Now, all I needed were the materials to build it...
The core is the trusty 2mm foamex with sides and ends cut and superglued together. To provide a bow roof, I superglued a piece of 10 thou to formers glued between the walls for strength. For the corrugated iron, I could have used styrene sheets -fine for the walls -but what about the roof? Again I am indebted to the wonderful Iain Robinson who suggested fashioning corrugated sheet out of Kitchen foil embossed over strips of wire. A quick search on youtube resulted in a great video of a guy making 1:50 scale corrugations using cocktail sticks...wrong scale, but right technique.
Off I went down to the local Pound Emporium to find their foil was very flimsy, but what they did have were some foil serving trays - absolutely ideal - thin enough for scale thickness but rigid enough to accept embossing. A trip next door to Asda resulted in a coil of garden wire for the embossing. This stuff is stiff wire with a plastic coating -as it comes, it's ideal for scale soil pipes - the 6inch stuff, but for corrugated iron embossing would need to be stripped - and then it's ideal for downpipes! This stuff is a bargain at just a pound.
Getting it home and making a start on the jig, I encountered difficulties in getting the wire straight enough for purpose. I just couldn't seem to get enough of them dead straight, so I abandoned that idea and looked again to my trusty pvc foam board for help. I printed off a set of lines I'd drawn in Illustrator 1.5mm apart and stuck them to the piece of pvc foam. I then used a ball point pen (rounded tip you see) and a ruler to heavily draw lines into the foamex and leave an imprint. After I'd got my imprint, I taped a piece of trimmed tin foil to the jig, small enough so I could see the lines top and bottom and followed the lines on the foil with my pen. The result is a believable piece of corrugated tin.
 |
| Here's the little fella with a blast of Poundshop grey primer. Hinges and catch made from 10 thou plasticard |
 |
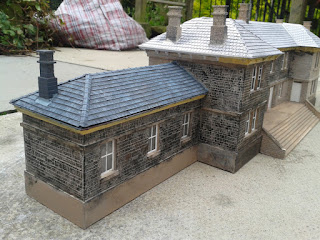
| Another view of the Primed hut next to the Signal box steps. (Signal box steps still need final painting and gluing to the box. I've thrown away the door again. Mark V will be glued in the open position... |
 |
| A bit of dry brushing over the primer grey with a light grey gave a good base decoration |
 |
| Rust was liberally, but subtly (this is not a completely rusted to hell hut as yet) applied using Humbrol Rail Acrylic Rust colour with a dry brush |
 |
| I really like this view. I've now got added incentive to finish the steps and get the whole mini diaroma sceniced up |
 |
| And the hut in it's solitary glory |
I'm really really pleased with how this turned out, and there's nothing else to do on it now, but bed it into a base. One of the most pleasing things for me was the top vent. I cut a piece of plastic tubular lolly stick I'd been saving for modelling purposes, and cut 3mm off the end. I then superglued this to a piece of 2mm foamex. Once stuck solid, I trimmed the foamex roughly around until I was left with about 1mm of material all the way round, then I took a sanding block and hand sanded around the edge until it was mostly circular. Then, here came the fun part. I put the lolly stick end in the chuck of a battery drill and tightened it up leaving the rough side up, switching to top speed I fired it up and then introduced the sanding block to the foamex, sanding it circular. Then I could angle the block to shape the conical top - voila. Then it was simply a matter of supergluing to the roof and priming.